Creating HPC Workflows
The workflow editor is where workflow pipelines are created and executed on the cluster.
Drag and Drop
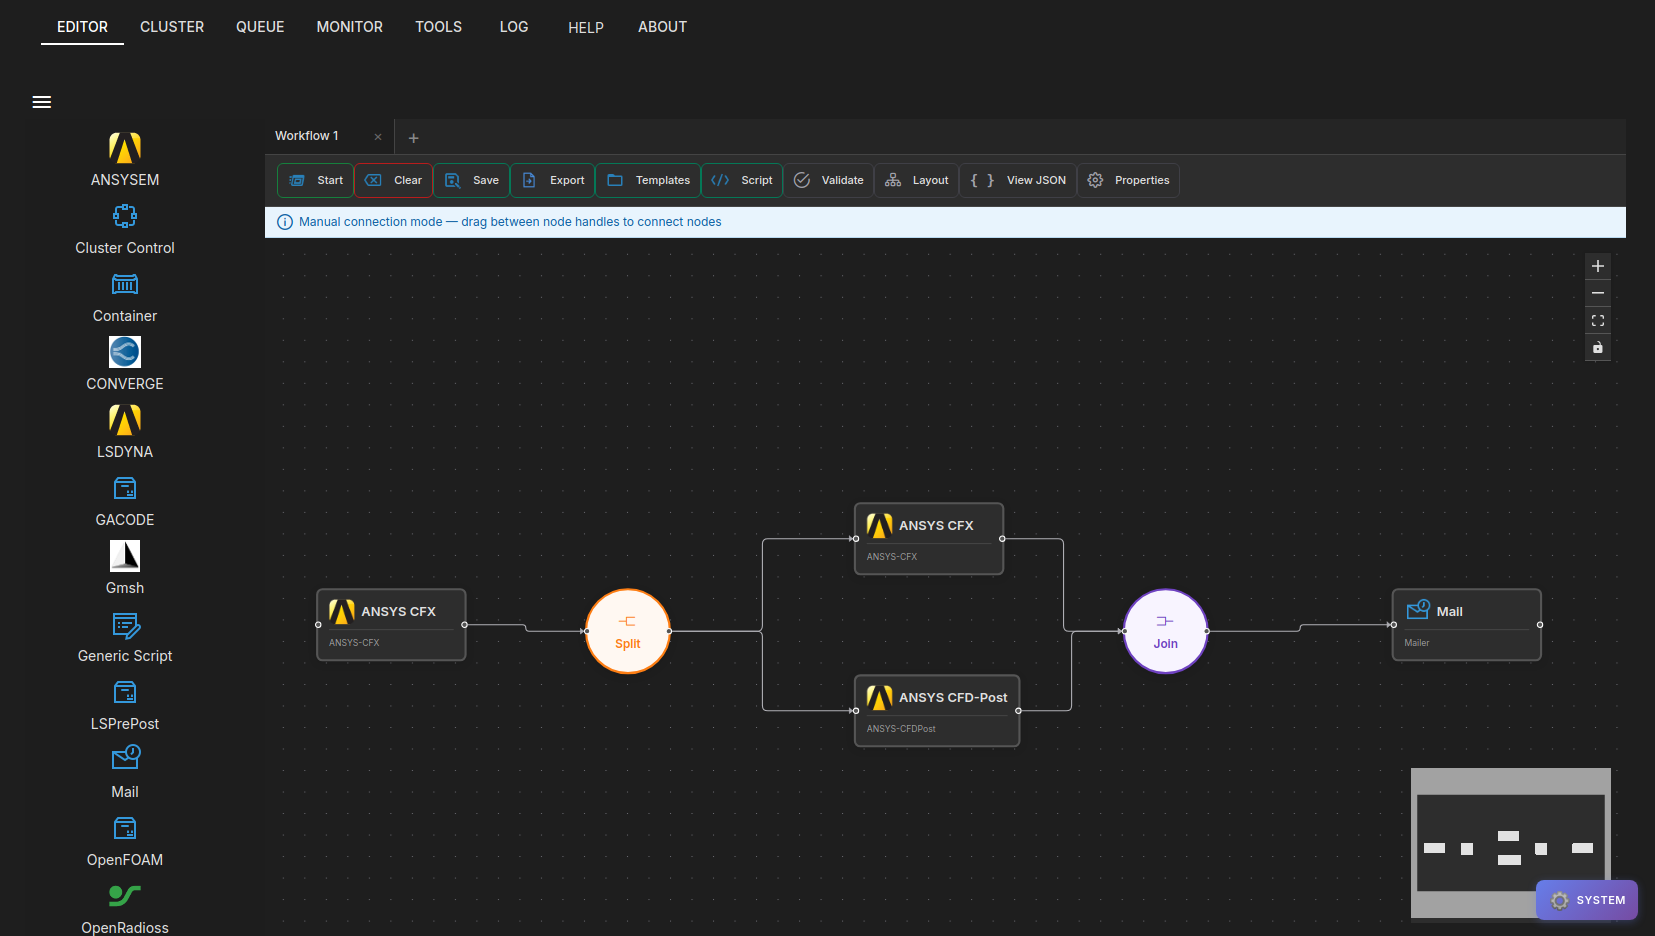
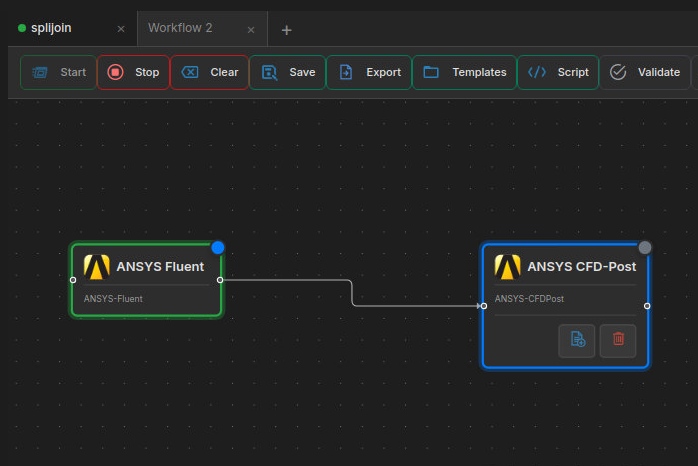
Workflow pipelines can be created by dragging and dropping applications from the side navigation bar into the main workflow editor area.
Workflow Steps
Each application once dropped into the workflow editor area displays its view page and this page is used for setting up the workflow step. Users can transition between the different steps by clicking on the appropriate step in the workflow chain displayed above the step view.
Clearing Steps
To clear the pipeline and start over, click on the Clear button at the bottom of the workflow editor area.
Submitting a pipeline
Once the workflow pipeline is created and all the required step settings are correctly provided, the pipeline can be submitted using the Start button at the bottom of the editor area.
Saving, Loading and Scripting Workflows
Workflows created with the workflow editor can be saved for later use as templates. Furthermore, the entire workflow can be exported as a single BASH shell script for later use. The buttons in control panel at the bottom of the workflow editor can be used for these workflow operations.

- Start: Starts the currently loaded workflow.
- Clear: Clears the currently loaded workflow.
- Save: Saves the workflow currently created in the editor into your workflow template collection. The workflow template collection for all users exists is created under $HOME/.drizti/hpcbox/workflows.
- Export: Exports out a workflow and saves it as a file in your desired location.
- Script: Generates a shell script for batch execution of your workflow.
- Templates: Launches the Template manager for managing workflow templates.
- Validate: Checks that all workflow connections and flow control nodes (Split, Join, Decision, Loop) are correctly configured. Shows a success message if valid, or a specific error describing what needs to be fixed. See Flow Control — Validating Workflows for details.
- Layout: Auto-arranges nodes on the canvas.
- View JSON: Shows the raw HPCBOX job JSON for the current workflow.
- Properties: Opens the Workflow Properties panel (working directory, project ID, step data passing).
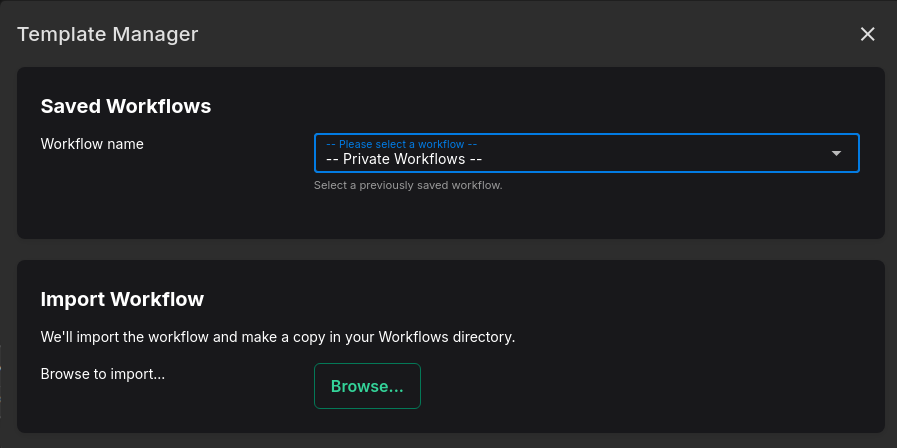
Template Management
The Template Manager is started when clicking on the Templates workflow button. This Template Manager can be used to load an existing workflow, or, to import a workflow file (created prior to version 1.3.3 or provided by another user) into your workflow template collection.
Use the ![]() button to clone a step along with its options as the next step in the current workflow.
button to clone a step along with its options as the next step in the current workflow.
Use the ![]() button to remove a step from the current workflow.
button to remove a step from the current workflow.
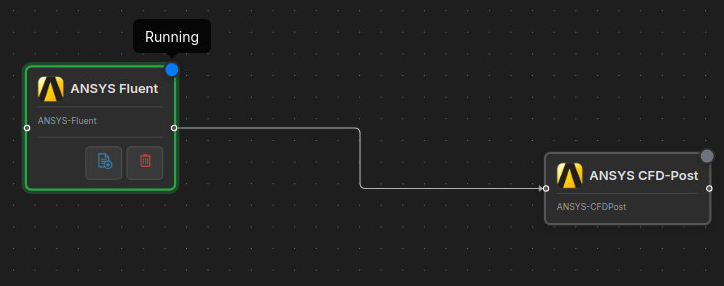
Workflow States
When a workflow is running, each step node on the canvas displays its current status directly via a colored indicator dot and a pulsing border. You can hover over the indicator dot to see the status label as a tooltip.
Status Indicators
| Status | Indicator | Description |
|---|---|---|
| Pending | Grey dot | The step has not started yet and is waiting for its turn in the pipeline. |
| Running | Pulsing green dot with animated border | The step is currently being executed on the cluster. |
| Completed | Green dot | The step finished successfully (exit code 0). |
| Error | Red dot | The step failed (non-zero exit code). The workflow stops at this step. |
Tooltips indicate the current status along with the color indicators.
Running Indicator on Tabs
When using multiple workflow tabs, a pulsing green dot also appears on the tab header of any workflow that is currently running, so you can see at a glance which tabs have active jobs.
Once a step fails, the entire workflow stops at that step. If you have multiple workflow tabs open, other workflows in separate tabs are not affected and continue running independently.